This basic sorting example shows how to use the Advanced Sort Panel. In this example, we are creating a grid that shows Sales by Country as columns, and Promotion Category and Product Category as rows. You will learn how to sort the grid in descending order according to its Promotion Categories and Product Categories.
Tip: Because the Sorting functionality in Discover is both very flexible and very powerful, we recommend that you "walkthrough" some different examples to see how different settings made in the wizard interact to produce the overall functionality. For a more advanced sorting example than seen here, see Advanced Sorting Example.
Using the Advanced Sort Panel
Objective
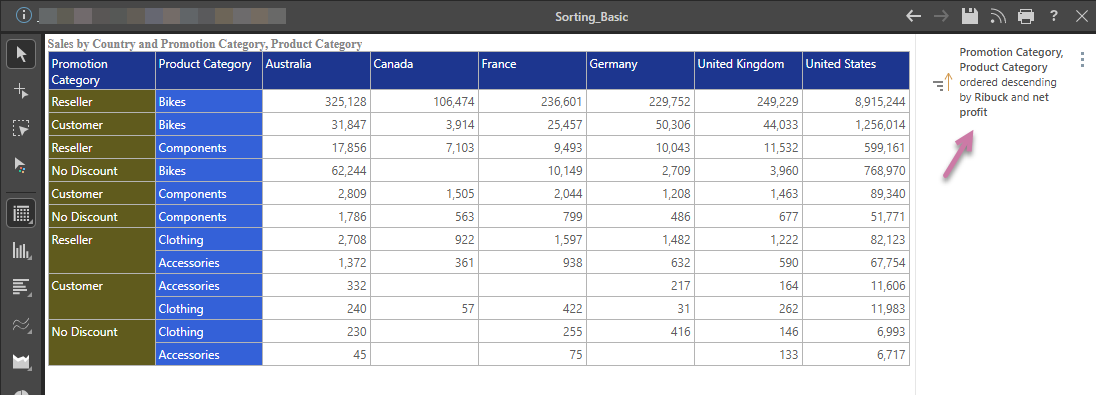
In this example, the initial grid shows Sales by Country as columns, and Promotion Category and Product Category in rows. These steps show how to use the Advanced Sort panel functionality to sort the grid in descending order by a single manufacturer (Ribuck) and measure (net profit). The resulting sorted grid appears as follows:
Step 1: Add Sorting to your Grid
With your discovery open in Discover, do one of the following:
- From the Home ribbon, click Sort & Filter > Sort.
- From the Query ribbon, click Sort > Sort.
The Advanced Sort panel opens at the bottom of the page:
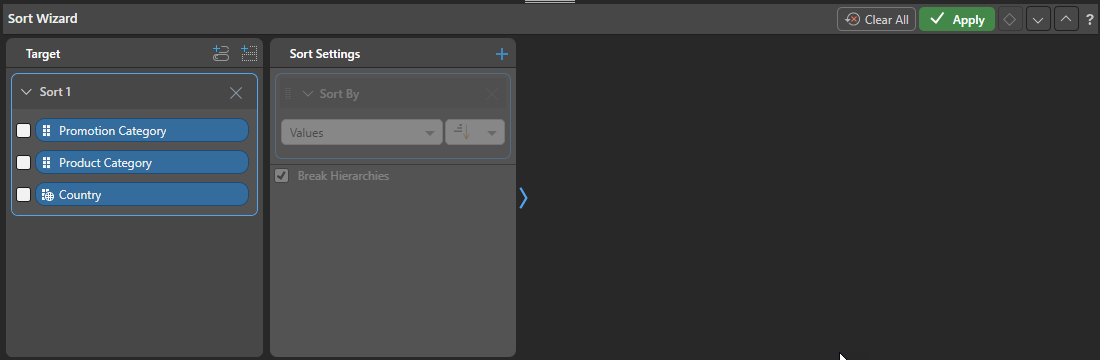
Note: The preceding image shows the default options in this panel, given the selected chips in the discovery.
Step 2: Select Targets
Since we want to sort the Grid by Promotion Category and Product Category, we need to select those Chips in the Target panel:
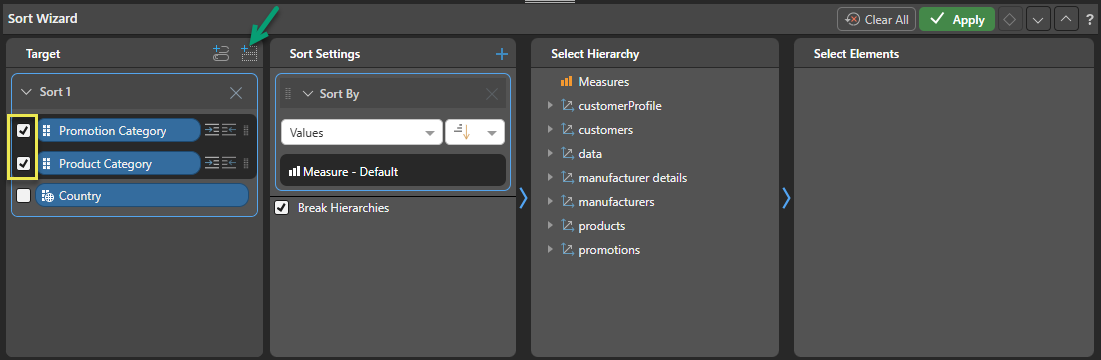
Tip: Since our selected Chips are both in the Rows drop zone, you could (alternatively) select the Rows Drop Zone as the target (green arrow above). This would have the advantage that adding chips to the drop zone in future would extend the sort automatically.
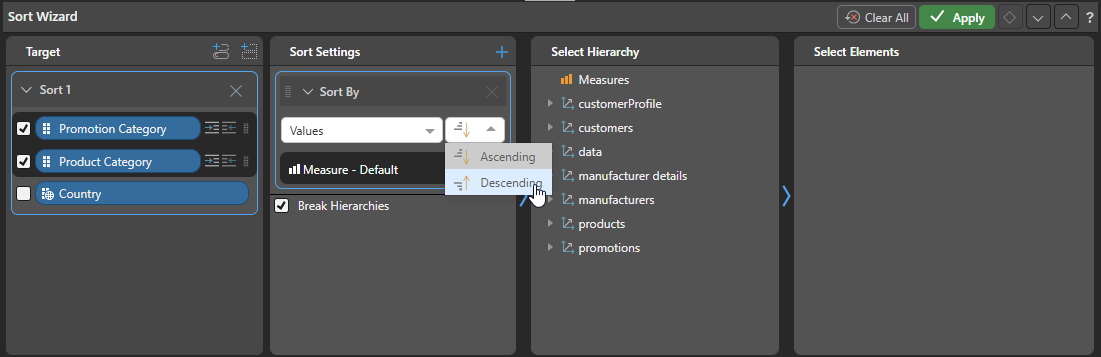
Step 3: Configure Settings
From the Sort Settings panel, set up the basic sort by selecting:
- Sort Type: Values.
- Sort Order: Descending.
- Break hierarchies. (This is an optional selection, for more details about how this will affect your sorted output see Break Hierarchies.)
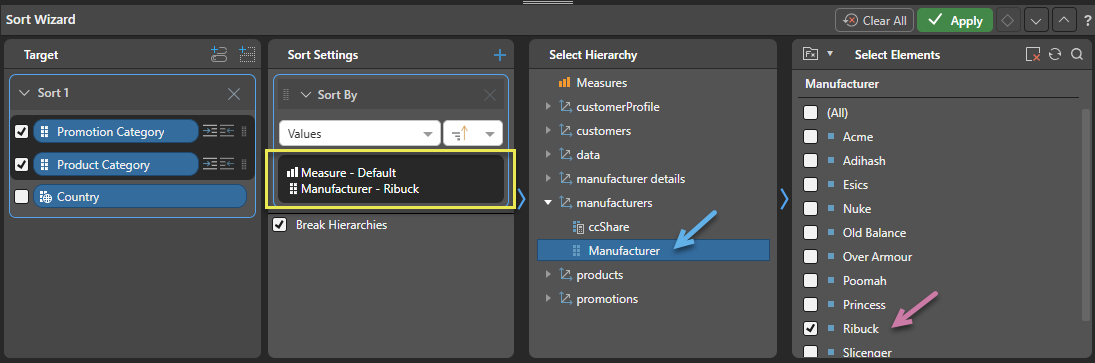
Step 4: Adding additional sort elements
To sort the Grid by additional elements:
- Go to the Select Hierarchy panel and open the relevant dimension. Select a hierarchy (blue arrow below).
- Select an element from the previous hierarchy in the Select Elements panel (purple arrow). You can select multiple elements, but only a single element from within any one hierarchy.
Your selections are displayed in the Sort Settings panel (yellow box).
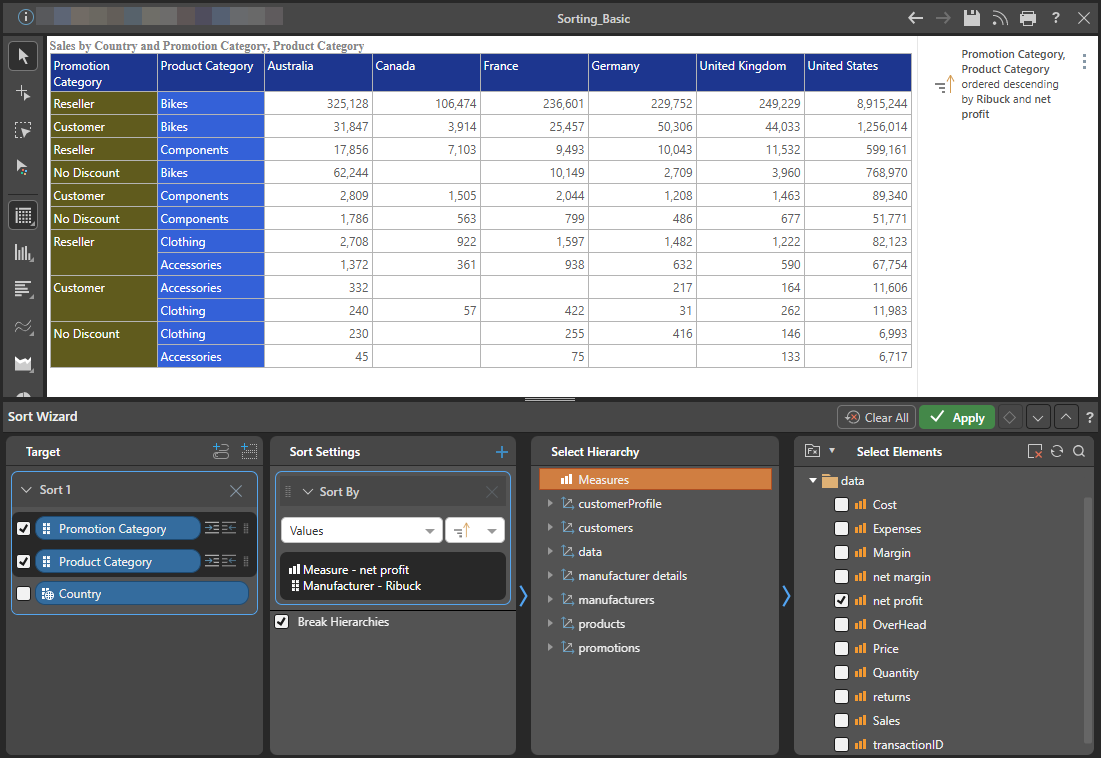
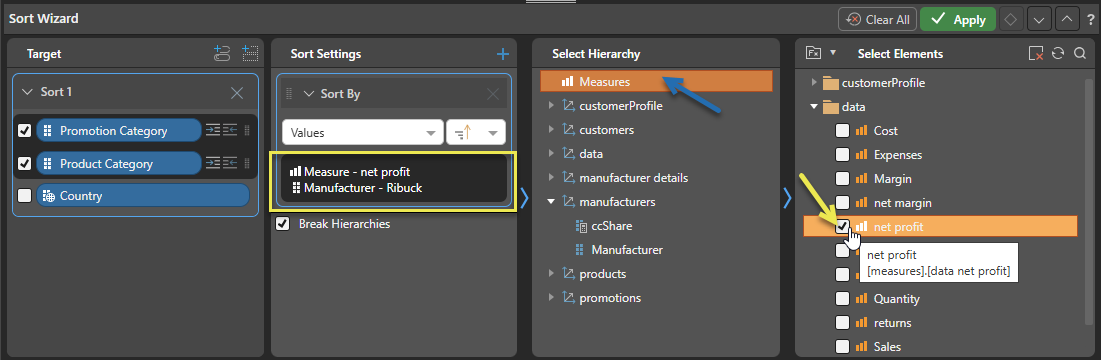
Step 5: Adding additional sort measures
To sort the Grid by additional measures, you need to select them in the same way. The only difference is that, instead of selecting a hierarchy and then an element, you select Measures (blue arrow) and then a single Measure (yellow arrow):
Step 6: Apply your Sort
Once you've configured all your sorting options, click Apply.
Your Grid is sorted. Note that the Sort Info caption that has been added to the canvas (purple arrow below) describes the Sort that you just created using natural language: